|
|
|
| To the Rules Page |
Napoleonic Game Rules Demonstration
The scenario file you can get from me on request is designed to illustrate as many of the rules as possible in order to show them in a battle in progress. It can be opened in BGW 32bit original version and viewed in combination with the descriptions below. While the tactics displayed may not be among the best, or even advisable, each situation described is possible in any game and serves to show how each rule works.
The map is covered generally from left to right with each vignette taken in turn, so the rules are not looked at in their own sequence. The rule being illustrated is given at the start of each paragraph. Each picture of the part of the battle being used, which when clicked opens a larger view in a new window, is keyed to the text and can be used instead of running the scenario.
 1.
Road movement
Pire's
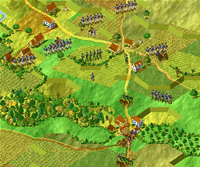
cavalry division has made a move to the left using the road movement bonus. The leading
unit, 5th Lancers at 16,26 has moved through the village of Pospel and must
therefore be in road column even if not getting the road bonus, because cavalry not on a
road are disrupted by movement through villages. Their strength of 400 indicates a road
column length of 3 hexes, after which the 6th Lancers, following them, are
positioned in 16,29. These intervening hexes of road are used by the cavalry, but the 2/4 Artillery
can occupy the same road hexes as the cavalry and are therefore between the 5th and 6th Lancers. Other cavalry or infantry cannot occupy such a hex.
2.
Proximity to enemy units
The 3rd
Belgian line infantry17,26 may remain in their position adjacent to the enemy cavalry;
they may not have moved to this position after the cavalry arrived, being unable to approach to less than 2 hexes
distant. The skirmishers at 15,25 are legally placed and can stay there as long as the
French cavalry does not turn to face them. The skirmishers at 16,24, however, are in the
charge zone of the 5th Lancers and despite being in a building hex are not
protected against the threat and must move to a distance of 7 hexes or out of the threat
zone to one side. Note that the cavalry threat exists even though the cavalry are
currently in road column - it is what could happen next move that the infantry must guard
against. The skirmishers in the wood at 15,27 are able to stand in the presence of enemy
units because they are in cover.
3. Forming square
If he deemed the
threat great enough, D'Aubreme (14,23) is entitled to have any or all of his units
form square. No part of Detmers' (17,19) brigade can see the cavalry approaching (those in the distance are not a threat) and will not be
able to form square until the turn after D'Aubreme's units have done so.
4. Distance from
commander
Detmers is not in
control of the 2nd Dutch Infantry in 10,21 because the maximum distance from their own
formation commander for formed units in the open is 6 hexes. The infantry should move to
within 6 hexes if they have orders, or remain inactive until their commander moves to within 6 hexes of them.
They will not gain the benefits of being within actual command radius until within the
distance set in the game's PDT file.
 5. Distance from
friendly and enemy units
In sending out
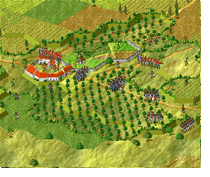
skirmishers, the French 6th Division of II Corps has moved some too far.
The maximum distance allowable to skirmishers from their own formation is 4 hexes if in
the open, so those at 29,31 and 31,31 are too far away and must move back, unless
their parent formation (29,36 - 31,37) advances, to support them. Additionally, those at 29,31 are within charge reach of visible enemy cavalry and cannot stay there.
The
skirmishers at 37,32 have run into enemy formed infantry and will have to withdraw at least one hex or run to cover. The French skirmishers in 36,31 are in cover and able
to stand against the same enemy.
Byng's skirmishers within the garden wall of Hougoumont (35,31) are in cover, because the wall protects them from all adjacent enemy units, and are not required to withdraw. The Field Jäger Corps in 38,33 cannot claim the same cover from the hedge, because it has been outflanked by the French in the wood at 37,33.
 6. Skirmisher
stacking
I Corps's
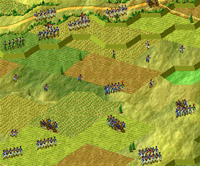
skirmishers in 49,27 are illegally stacked because companies should be alone in an open
terrain hex. Two stacked in cover are legal if each is below 100 strong. Those at 51,26 can stack because they total only 50 in number.
7. Isolated
skirmishers
The Belgian
skirmishers in 55,23 are legally placed to the flank of enemy formed infantry, but in
danger of being cut off by French skirmishers. They cannot move to 54,22 because it is directly in front of the French formed infantry. Skirmishers may
not be used to surround enemy formed units but can perform this function against foot
skirmishers as here (not cavalry piquets). The Hanoverian skirmishers in 60,21 have been bypassed
by enemy units and must now find a route to friendly lines or surrender. They may not fire
or fight unless in order to regain their freedom.
8. Artillery
stacking and fire
The French
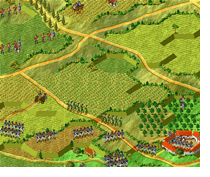
artillery in 52,25 are too numerous to fit into the hex, so only the top battery may fire.
If two weak batteries totalling fewer than 10 guns are in one hex their positioning can be
seen as possible side by side, otherwise batteries should be in separate hexes.
9. Overhead fire
The French
artillery battery in 54,25 would have a clear field of fire, but it is behind the column of
infantry sharing its hex. Batteries fire as whole units and although the frontage of the
column would not fill the hex, the range is obscured and the battery would be unable to
use a considerable portion of its strength so cannot fire. The friendly units in the
valley 2-3 hexes in front of the battery are out of sight and so cannot be blocking the
line of fire.
The guns in 56,24 are positioned in front of the infantry in the same hex, but they cannot employ overhead fire. The friendly units in front of them are in line of sight and potentially in danger, the battery being on the forward edge of the higher ground.
10. Fire blocked by
skirmishers
Rettenburg's
battery in 56,18 has its field of fire half blocked. It cannot choose as a target any
enemy to the east of the 21st Line in 59,23 because of the danger of hitting
friendly skirmishers in 57,19.
 11. Priority of
targets
Many players would
probably prefer Stievenart's two guns in 62,18 fire a factor-inducing flank shot at
the enemy cavalry in 60,19. But the greater threat is from the infantry in 61,20 so they
must fire at this target. If the cavalry was facing the guns it could be counted as the
greater threat even though the same distance away. If they had a line of fire to 60,20 the
French cavalry there could also be counted as a greater threat than the infantry, because
although farther away they are within charge reach.
Similarly, the 2/2nd
Nassau Regiment in 63,19 must fire at the infantry in 63,20 rather than those in 62,20
because the latter are facing away and unable to fire at this Nassau unit, making them the
lesser threat.
The 3/2nd Nassau battalion in 64,19 must fire at the French infantry facing them and the gamesmanship of a flank shot at the farther target in 63,20 is not permissible.
Gardiner's troop in 67,12 can engage any of the enemy infantry in preference to the guns in 69,14. Counter-battery fire should never be given higher priority than fire at formed units in a position to pose any sort of threat to the guns.